
Some time ago, I got an idea to make a scrappy spider web quilt. One of my favorite quilters, Amanda Jean of Crazy Mom quilts provided the inspiration. Even though she no longer writes about quilting, I see her posts on IG and she was making a mini version not too long ago. This pattern isn’t new, both Bonnie Hunter and MSQCo have one. So, armed with a Periwinkle template, I ordered Wacky Web triangle paper and promptly forgot all about both… Until this spring, when I found myself with overflowing bins of 2″ and 2.5″ strips, and decided that it would be the perfect time to make this quilt and de-stash my scraps!
My layout for this quilt is 4 x 6 blocks, each one is made with 4 triangles. It will have two borders – a thin inner border made with neutral fabric and a 4.5″ outer border from a fun multi-colored print I picked up on sale. The finished size will be 58″ x 82″.
I will be pressing all seams between the units open, it will make the blocks lay much flatter and reduce the bulk. I also decided to remove all of the papers. Even though the blocks are on a bias, it has helped to match the center points. I’m using a shorter stitch length and being VERY careful not to stretch while sewing. I have pinned every seam to make sure I don’t have to pick them out. It would really shred the biased edges.
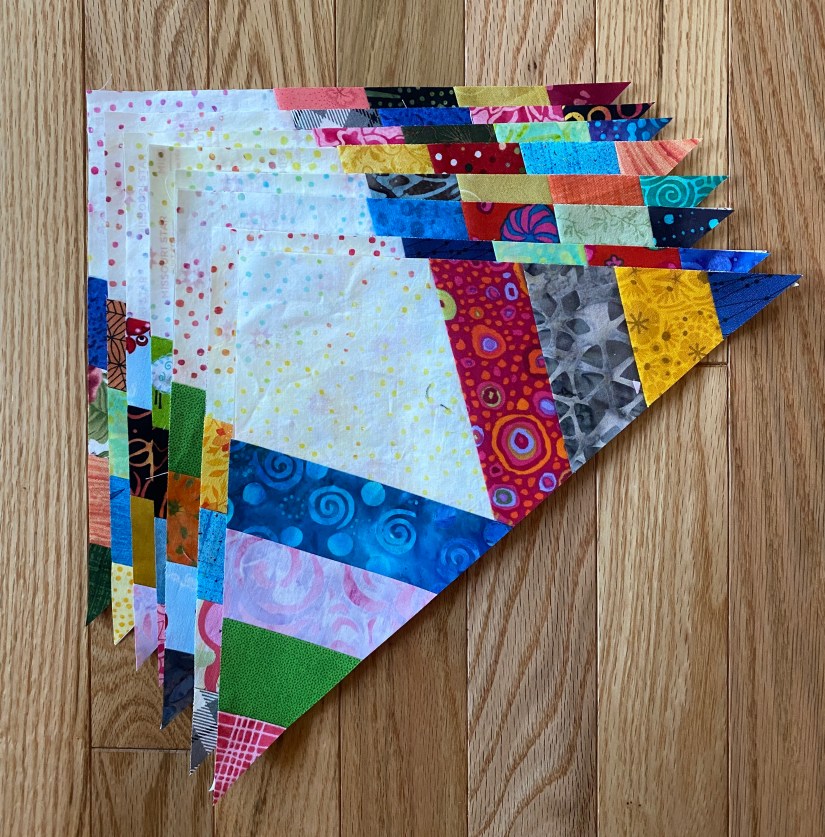
Some of my test blocks made with 2″ strips. Since I didn’t want to worry about matching seams, I decided to make a second set of blocks with 2.5″ strips, 48 of each.

Making these with larger strips went much faster! I also made piles of precut strips and just randomly added them to 48 foundation papers. All units were made in two sessions of 4 hrs each. Easy sewing!!
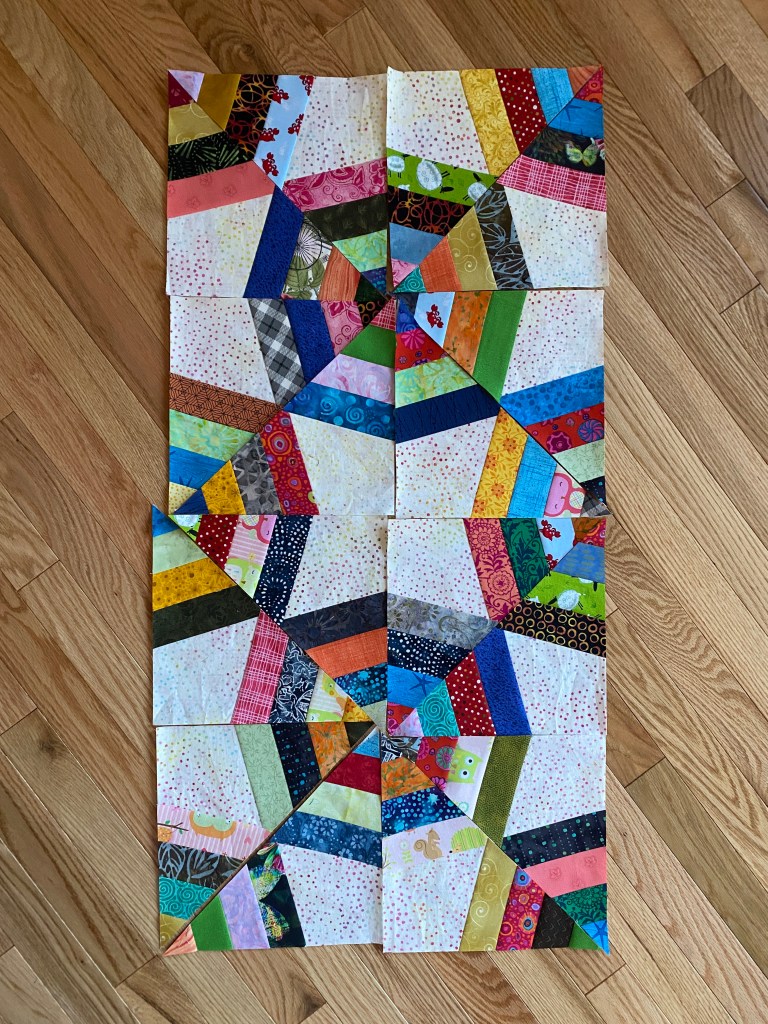
This was the original plan for layout – 18″ blocks. When I added two more rows, I just didn’t like how the webs looked, so I had to re-arranged the blocks.

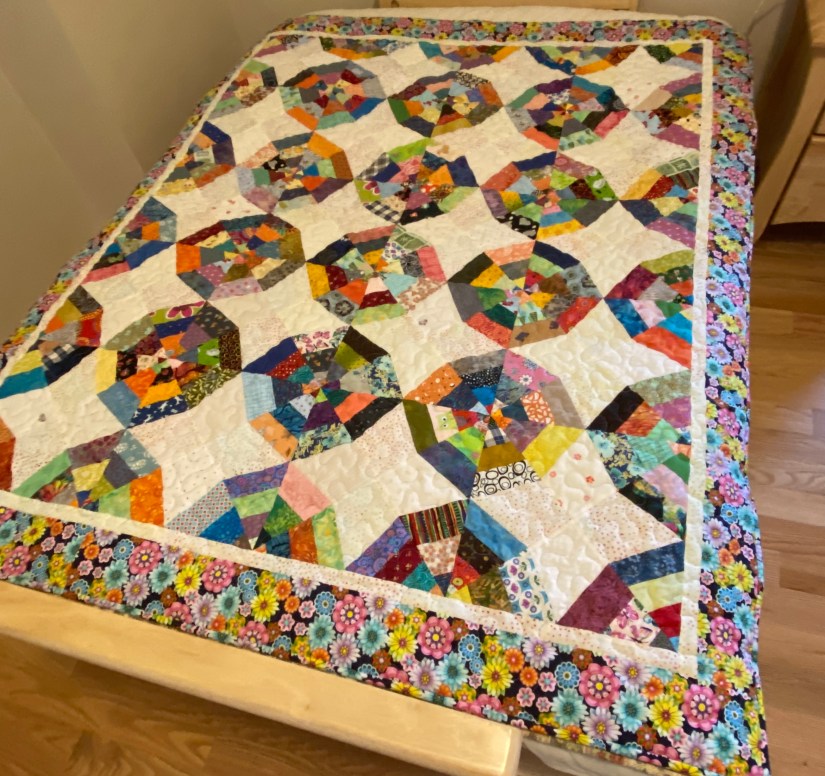
This is the final layout. A good lesson learned here – don’t be in a rush to start your quilt assembly before layout out all blocks! I have put together 3 blocks before realizing I didn’t like the original layout. I will now have to be more creative about how to assemble the rest of the flimsy.
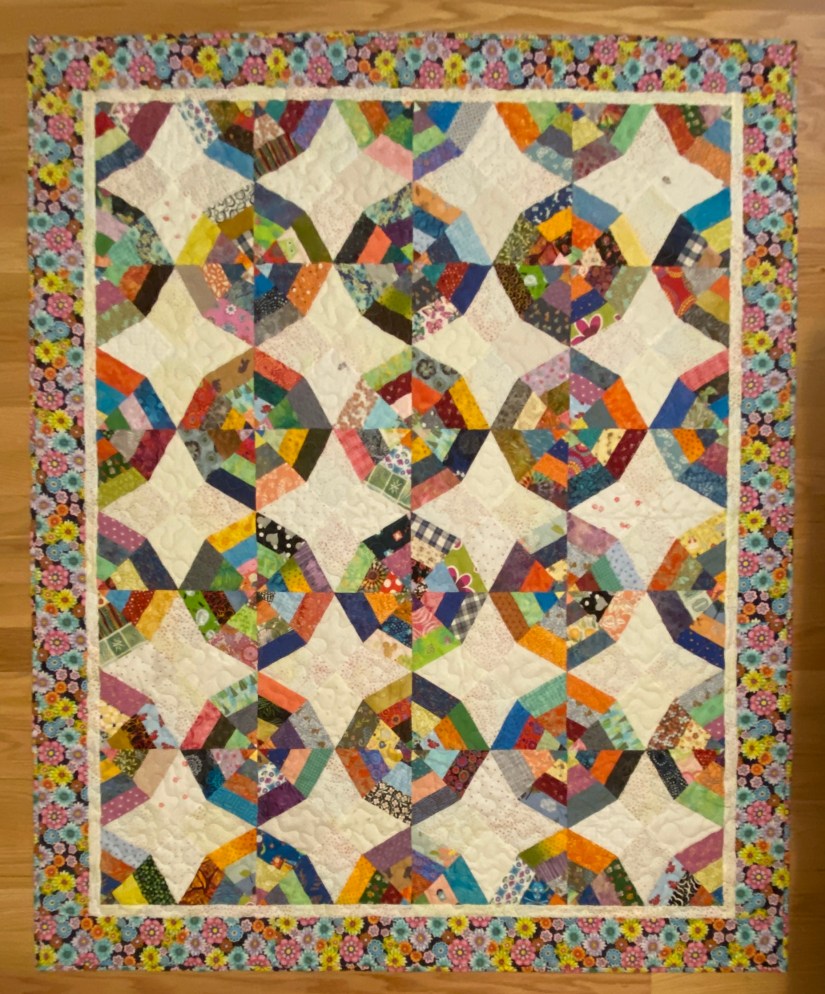
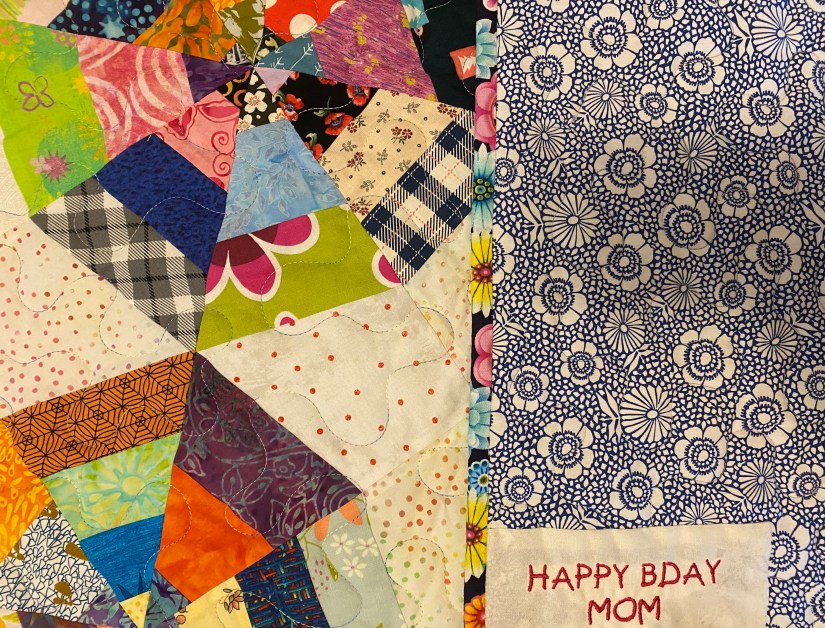
This is my finished quilt! It will be a gift for my Mom.
I’ve added borders and removed the bottom row of blocks, making the finished size 58″ x 70″, perfect throw size! The leftover 16 blocks are currently homeless. I decided on one piece backing – left pic below and wool batting. Its soft and snuggly and perfect for my Mom!